What if the secret to producing one of the most consumed supplement lies in your household?
As a fitness expert, I've found that whey protein helped me achieve my wellness goals. After thorough research, I have managed to find the ingredients that allow you to make whey protein from the comfort of your home.
Rest assured, homemade whey protein offers the same benefits as store-bought versions.
Explore with us the secrets of crafting your own whey protein in the comfort of your home.
Quick Summary
- To make whey protein powder at home, heat milk, add lemon juice, strain the mixture, and then dehydrate and blend the whey into a powder.
- Making whey protein at home is cost-effective, with the main expense being the milk.
- Homemade protein products can last up to 6 months when stored properly.
- While making whey protein at home offers a natural and unprocessed alternative, the effort and time it took me might make commercial options more appealing for regular consumption.
What Ingredients Will You Need?
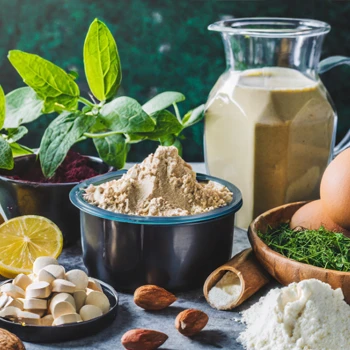
From my experiments in the kitchen, the most crucial ingredient for homemade whey is fresh, preferably organic, milk (I once ventured with yogurt and cheese, but the outcomes were hit or miss).
You'll also need a couple of lemons, and again, I would recommend that you buy some organic ones as well.
An optional item you can add at a later stage in the process is some natural flavors like dried fruits, vanilla beans, or a hint of cocoa, which can elevate the taste of your homemade protein powder.
When considering adding cocoa, get some raw cocoa from a health food store, as this will help you avoid creating a high-carb sugar drink.
Do You Need Specific Equipment?

Drawing from my DIY adventures, I've realized that making homemade whey doesn't require fancy equipment; common kitchen items suffice:
- Large 2-gallon pot
- Food thermometer
- A lemon press
- Cheese strainer (I did try this with a linen cloth before, but it doesn't seem to work as well)
- Food dehydrator (it will reduce the risk of overheating or burning the protein)
- Jar (to store your whey protein once you finish with the process)
Now, let's get to the exciting stuff.
The 9-Step Process
I've refined this process over time to make my own protein supplement effectively.
But if you follow these instructions, you should be in good shape.
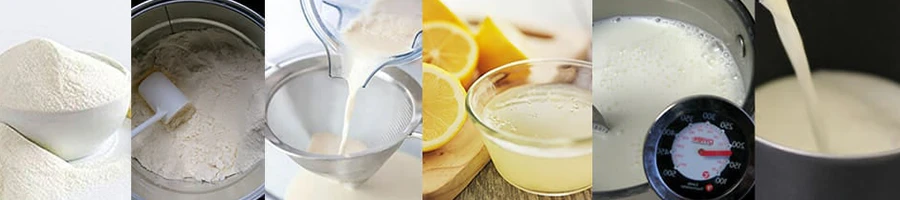
1 - Pour Milk Into A Pot: Pour the full gallon into your pot, or adjust it down if you only need a small amount of protein. You'll get about 100 to 120 grams of whey protein from a full gallon.
2 - Heat The Milk: Slowly start to heat the milk and check the temperature every few minutes with a food thermometer. At about 180°F, the milk will start to simmer, and you must maintain that heat to avoid changing the structure of the amino acids [1].
"Heat may not affect the amino acid structure of the protein or its nutrients, but it might affect the functionality of the protein. Functionality refers to the behavior of the protein, particularly its solubility."
- Frankie Smith, Health Clinician
3 - Add Lemon Juice: Squeeze out some lemon juice and stir 5 tablespoons into the heated milk. Leave the entire liquid mixture simmer. Make sure you avoid bringing it to a boil!
4 - Let The Mix Rest: Turn off the heat and set the pot aside with a tight-fitting lid for around 20 to 30 minutes. Don't place it in a cool place, as you want the protein and other nutrients to gradually separate.
5 - Strain The Mix: You will need a large bowl and a cheese strainer. Slowly pour the contents of the pot onto the strainer, but make sure you take your time. The curds will get caught in the strainer, and you can set those aside once it's thoroughly strained.
6 - Allow Whey To Drain: Place the bowl and strainer from step 5 in the fridge and let it cool and fully drain for about 2 to 3 hours. By keeping it in the fridge, you also avoid it spoiling during the process.
7 - Dehydrate The Whey: The easiest way to achieve this is by investing in a dehydrator. You can get them quite cheap online, and they will take a lot of hassle out of the process. Place the liquid whey in the dehydrator for about 12 hours at 135°F. The liquid will look a lot more like water at this stage.
8 - Process Whey Without A Dehydrator: If you don't have a dehydrator, then you can place the liquid in a pot, heat it to medium heat, and let it simmer. Gradually, it will start to become thick and clumpy. Then transfer it to a tray lined with some baking paper and allow it to dry out for 12 hours.
If it's not fully dried out, then break it up and allow another 12 hours of drying.
Just keep in mind that this step is not ideal if you want to maintain the optimum nutritional value of your whey protein.
9 - Blend Into A Powder: Use a food processor or a blender to create a powder and also mix in some natural flavors like vanilla or cocoa powder. If it still feels a bit damp, then leave it dry for another few hours before you place it in a tightly closed jar.
Enjoyed this post? Read our other related articles:
FAQs

How Much Does It Cost to Make Protein Powder?
It only costs a few dollars to make protein powder at home, with the most expensive thing being the gallon of milk. Even when you factor in the electricity to heat up the milk, it will work out cheaper than buying protein shakes.
Does Whey Powder Go Bad?
Yes, whey protein powder goes bad and will lose a lot of its effectiveness. Homemade whey will generally last for about 6 months if stored in a cool and dry place. But make sure you look for signs that it may have gone bad.
Is It Really Worth The Effort?
After perfecting the process, I pondered if the effort was truly worth it.
While the ingredients are affordable, the process requires effort. Plus, determining the exact protein content for dosage can be challenging.
So, while I did enjoy my little DIY project, it’s actually more taxing than I thought.
These days, I just stick with a few high-quality whey protein powders that are suitable for muscle gain and weight loss. Other options, like
If you have some tips to add to the above guide, then reach out to us on social media.
References:
- https://www.ncbi.nlm.nih.gov/pmc/articles/PMC5807855/
About The Author
You May Also Like


I’ve been researching how to make protein powder from scratch to save myself a few bucks. This is the best one I’ve seen so far.
So, this is how a protein powder is made!
Hello! What is the quantity you would yield from this?